|
GPU Splatting
1.0
A deferred render that draws the surface of point cloud data.
|
|
GPU Splatting
1.0
A deferred render that draws the surface of point cloud data.
|
Splatting can be used to render the surface of point cloud data. We implemented the method described in the Paper 'High-Quality Surface Splatting on Today's GPUs' by Mario Botsch, Alexander Hornung, Matthias Zwicker and Leif Kobbelt. This implementation had been created in the course of the lecture 'Visualization 2' by Dominik Schörkhuber and Stefan Zaufl(Group 'The Splat Makers').
Simply run '/app/bin/vis2.exe'. Alternatively you may copy the program folder wherever you like. Then go the the 'app/bin' subdirectory and execute the program there.
The program uses a deferred renderer to speed up drawing. In the first pass the depthmap is calculated, in the second pass all attributes are written and blended onto the G-buffer. In the last pass the shading takes place. More information on this subject can be found in Vis2Application . The sources can be found in the 'app'-folder.
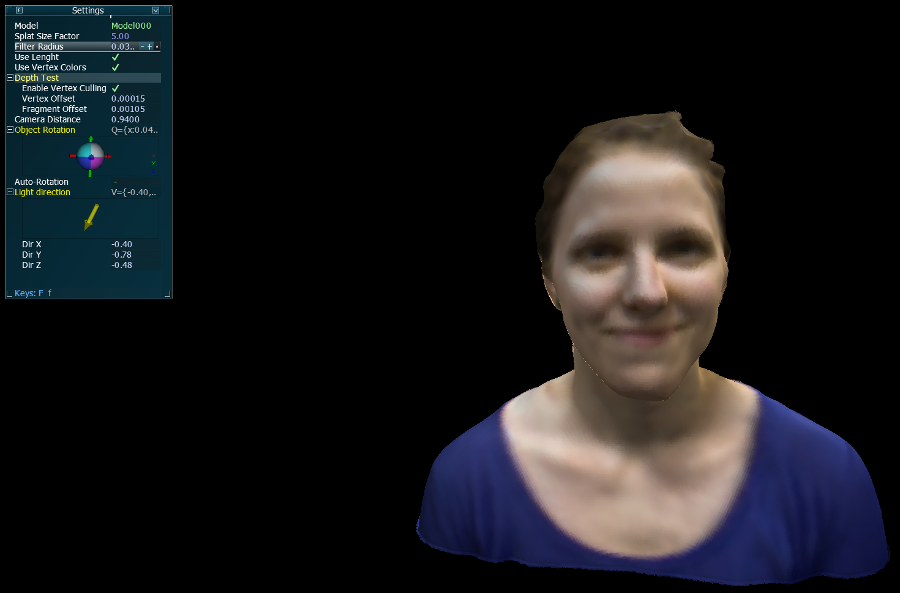
When you start up the application it shows you the default model - the bunny. The first thing you want to do for each model is to adjust the Splat Size Factor until the surface is closed.
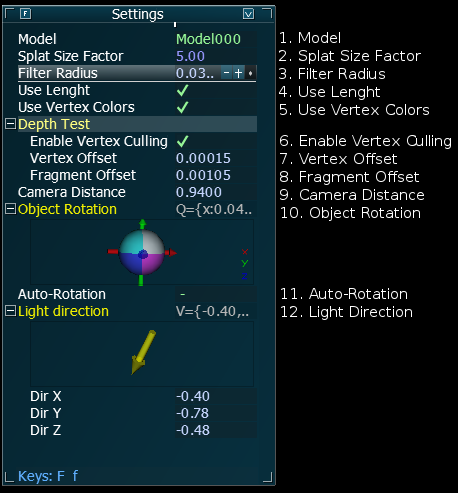
Model
Here you can change the currently visible model. You can only choose from the 3 models that come with this application.
Splat Size Factor
The factor that uniformly scales all splats. Turn it up until the surface closes.
Filter Radius
The radius of the (approximated) EWA-filter to prevent aliasing-artifacts.
Use Lenght
Uses the true lenght instead of the normalized lenght for the weight-calculation of each pixel of each splat.
Use Vertex Colors
Uses the colors stored in the Vertex.color attribute instead of displaying the surface normals.
Enable Vertex Culling
Enables/disables vertex culling: This culls a hole vertex instead of a single fragment.
Vertex Offset
The offset that will be applied to the vertex before it's tested against the depth-buffer.
Fragment Offset
The offset that will be applied to the fragment before it's tested against the depth-buffer.
Camera Distance
The distance of the camera from the origin.
Object Rotation
Controles the rotation of the object. Click and drag the rotation gizmo(ball) to rotate.
Auto Rotation
When checked the objects slowly rotates around its y-axis.
Light Direction
Controles the direction of the light-source. Click and drag the direction gizmo(arrow) to change the light-direction.
3D scanners produce point cloud data representing a surface. Such data cannot be viewed well when ony the points themselfs are beeing rendered. This technique can be used to visualize this kind of data in realtime.
 1.8.9.1
