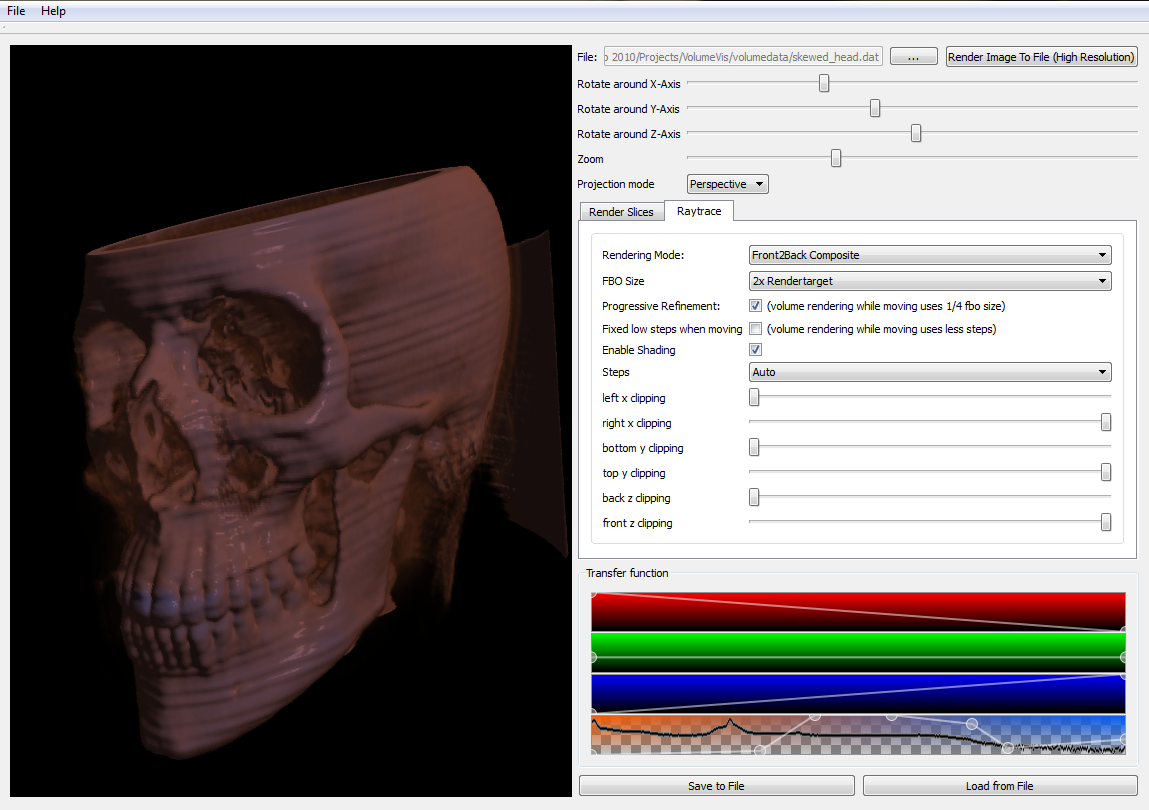
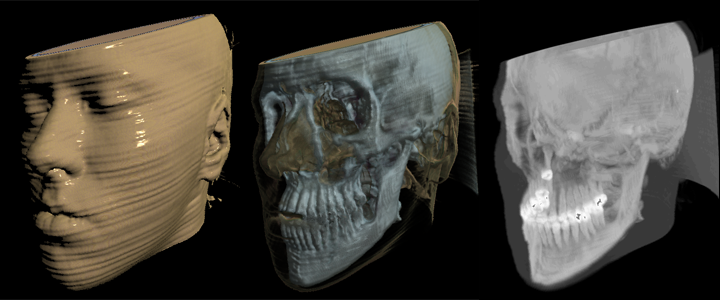
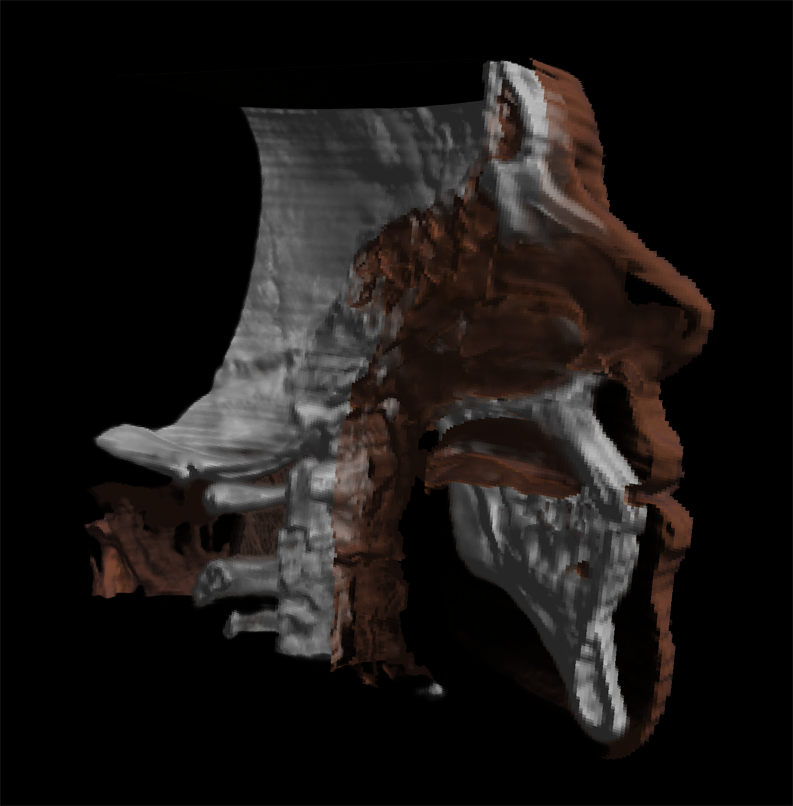
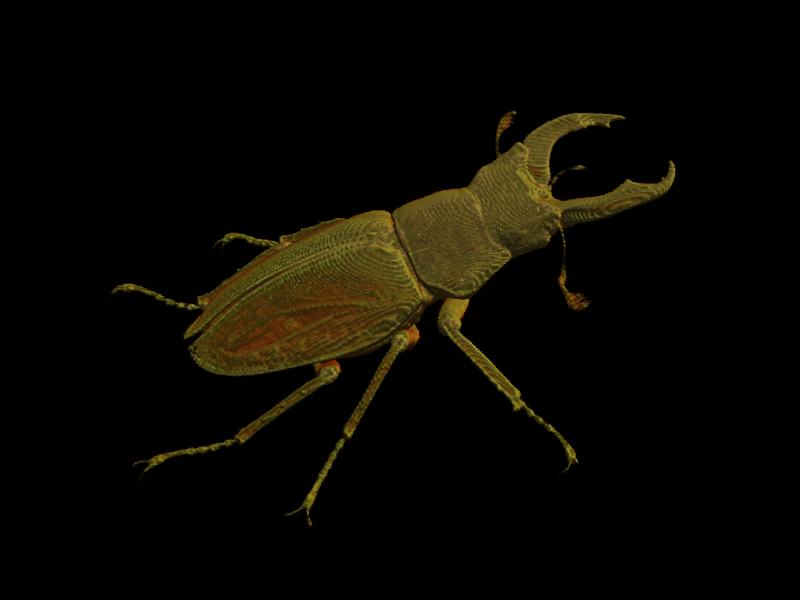
With the privided Application volumedata can be displayed and explored in 3D. A raycasting algorithm is used based on the paper [1] "Display of Surfaces from Volume Data" by Marc Levoy or you can use Slicing Mode and see each volumeslice of the X,Y or Z-axis.
Based on the paper we developed a software capable of visualizing volumetric datasets as an end-user application with intuitive interaction possibilities. Thanks to C++, OpenGL and Qt (qt.nokia.com) it is also a cross-platform application.
![]()
Data can be loaded by using File -> Open. A file dialog will pop up and let you choose one of the *.dat files. By confirming the file dialog the data gets loaded. Volumedata is processed, gradients are pre-computed and histogram data is shown.
The user has the choice between Slicing and Raycasting Mode by using the GUI Tabs.
In Slicing Mode the prefered axis can be selected and with the GUI Slider "Slice" you can select the slide to display. There are 3 slicing modes available:
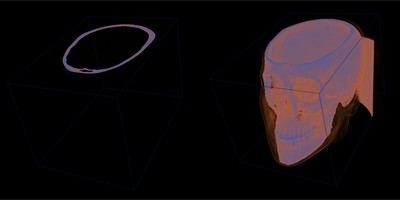
There are 3 different raycasting modes available:
Due to everything is displayed in 3D you can rotate around all 3 axis and zoom in and out to your rendered object. Simply drag the 4 Sliders from left to right until you are satisified with your view. For limiting the region of interest see "clipping".
With 3 RGB and one transparency widget that also shows a histogram of density as an overlay it is very easy to define complex transferfunctions. By clicking into the widget you can add aditional controlpoints. Control points can be dragged by holding the primary mouse button. To delete a controlpoint hover over it and simply press secondary mouse button. For everything you do you will get instant feedback in the rendering view to your left.
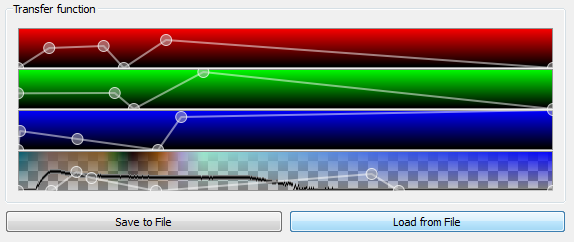
Transferfunctions can be stored in a file and loaded back into the program later with the buttons "Save to File" and "Load to File" below the 4 widgets.
If you want to limit the region of interest clipping planes can be moved into the volume from 6 sides (left, right, top, bottom, front, back). All you need to do is move the sliders labeled with "clipping" located inside the raycasting tab.
The current active 3D View can be rendered into an image using the "Render Image to File" button. The output image is always 4 times larger than the current active view. You can control the active view size (and therefor also the image output size) with the dropdown menu "FBO Size".
By using the checkbox "enable shading" you can switch between a Post-Shaded and a Pre-Shaded rendering (affects only F2B comp. and First Hit raycasting modes).
By setting "Steps" from Auto to a user value you can influence the quality of the raycasting by increasing the traversal steps through the volume. The setting "Auto" should give you a very balanced result.
For faster interactions (rotations and zoom) there are 2 speed improving options: One is to reduce the overall resolution that is used for raycasting and the second reduces the number of traversal steps for each ray through the volume. The GUI checkboxes for this are labeled "Progressive Refinement" and "Fixed low steps when moving".
You can download:
This page is valid XHTML/CSS and written by Christian Möllinger and Wolfgang Ludwig.
Sourcecode documentation was created with Doxygen.
This application was created based on:
[1]Marc Levoy, "Display of Surfaces from Volume Data"