 |
A Program for Visualizing Volume Data by Michael Knapp Visualisierung LU, WS 2000/2001 |
|
A Program for Visualizing Volume Data by Michael Knapp Visualisierung LU, WS 2000/2001 |
| What is it ? | This Program is designed for viewing computer tomography volume data interactively. The volume data is rendered by a direct volume rendering algorithm, which is explained briefly in the section "The Algorithm" below. |
| Features | Supported file formats:
Raw volume data files and Hewlett-Packard volume data
files Orthogonal Projection Interactive Transparency Control Interactive Threshold Control Interactive Rotating - Fast Preview using OpenGL Threshold Rendering Maximum Intensity Rendering |
| The Algorithm | Raycasting: First the volume data is transformed into an orthogonal grid. After that the shading and the transparency information is generated from this data using user defined parameters mentioned above in the "Features" section. For every pixel drawn there is a ray casted into these data sets from front to the back. The accumulated value is used for the pixel color. |
| Requirements | Microsoft Windows 95/98/NT/2000/XP with OpenGL |
Download |
Download
VolVis 1.0 with MSVC++ 6.0 Source Code (kontaktiere die Übungsleitung) ZIP file, 250KB |
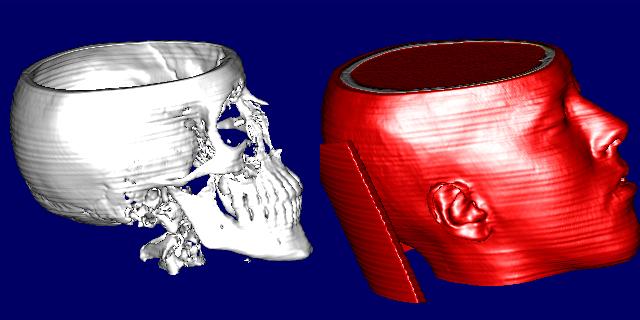
| Screenshot | 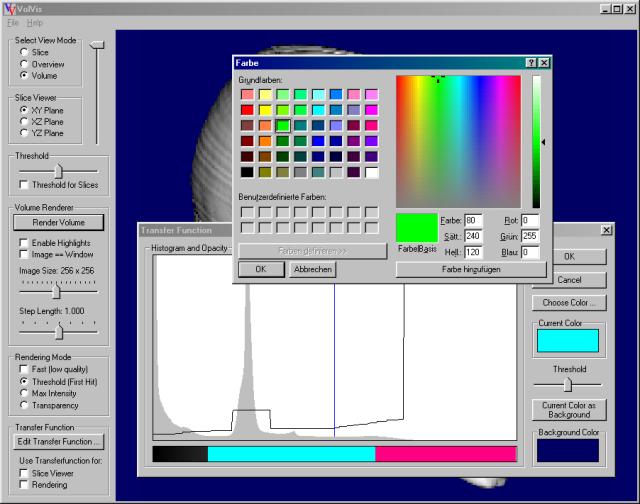 |
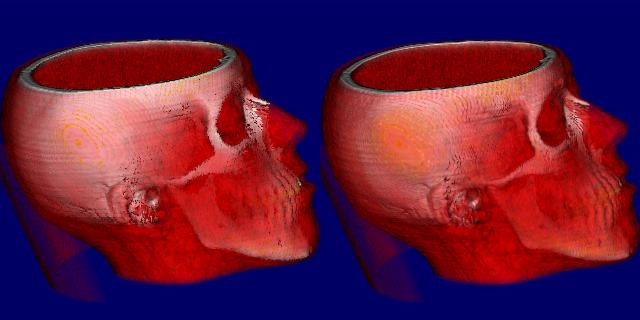
Rendering Examples |
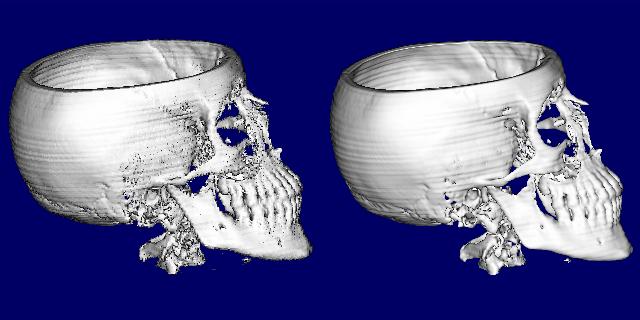 Figure 1: Threshold Rendering: Nearest Neighbour vs. Trilinear Filtering
|
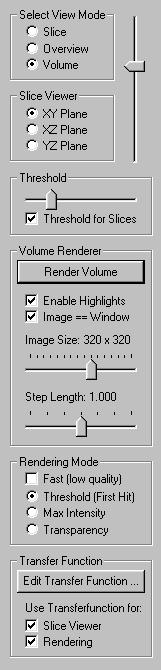
| User's
Guide
|
Select View
Mode
Volume Renderer
Rendering Mode
Transfer Function
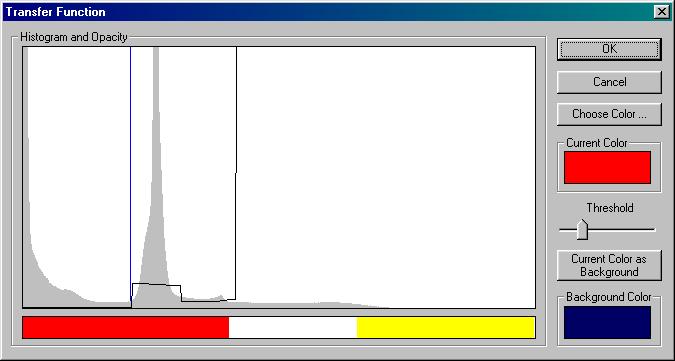
Transfer Function Window
|