This is the description of the raycasting- software which I programmed for visualization class. The program can be used to visualize all kinds of 3d- density data, usually acquired by computer tomography.
Installation is very simple, you only have to make sure, that the file Raycast.exe is in the same directory as the font file little.fnt. Otherwise there will not be any readable messages while running the program.
2.) Usage
Main Menu:
After starting the program (just double- click on the Raycast.exe file in Windows) there will be a window with only the message that no file has been loaded yet. Just type ‚l‘ (load) and after that type in a filename (eg c:\skewed_head.dat) and press Enter. When the file is loaded the message ‚ready‘ will be displayed. Now you can type the following commands:
‚t‘: This command will take you to the transfer fuction screen, where you can define your transfer function. Commands in this screen will be described in the section ‚transfer function‘.
‚s‘: This command tells the programm to run the shading procedure over the loaded dataset. In order to be able to see anything you have to shade at least once. Shading carries out the transfer function on the dataset, so after changing the transfer function, there has to be shaded again.
‚p‘: This command enables you to see a preview, which is generated by raycasting in a very small resolution. You can use the preview command to adjust the perspective before running the real raycasting procedure, which takes some time.
‚ x ‘: Rotate the dataset around an axis, which is parallel to the x- axis and goes through the center of the dataset.
‚ y ‘: Rotate the dataset around an axis, which is parallel to the y- axis and goes through the center of the dataset.
‚ z ‘: Rotate the dataset around an axis, which is parallel to the z- axis and goes through the center of the dataset.
‚ , ‘: Pressing the ‚comma‘- key enlarges the object and enables you to look at details.
‚ . ‘: The opposite, it makes the object smaller.
‚ n‘: This command lets the rays be intersected more often.
‚ m‘: The opposite of the ‚n‘-command.
‚ c ‘: This command starts the ray- casting procedure.
‚ e ‘: Toggle growing exactness
‚ k ‘: Decide, if there should be an immediate preview after each change
‚ r ‘: Region boundary isovalue surfaces
‚ g ‘: Decide, whether to scale the opacity with the local gradient vector
‚ Esc ‘: Press Esc to leave the programm.
Transfer Function:
It is possible to define up to three center values and the sizes of regions arount them. Data values which equal the first center value will be assigned opacity 1 and colour red, those eqalling the second will get opacity 0.6 and colour yellow and those equalling the third center value will have opacity 0.2 and be coloured blue. Data values that are within a region around any center value will be assigned the same colour as the center and an opacity depending on how far away it is from the center.
There is always one active center, whose values are displayed in blue colour in the upper right corner of the screen. The other centers are displayed in white colour. To make another center active, just click on its description.
The image on the left shows the first slice of the dataset (all values with z- coordinate 0). The colour white maps to a big density, the darker the grey, the lower the density. Below the image the density value of the voxel, which is currently under the mouse cursor is shown. By clicking on one voxel, its density value will become the currently active center value.
Commands:
‚ w ‘: increase the region around the first center value by the current interval- value (default 20).
‚ s ‘: decrease the region around the first center value by the current interval- value.
‚ e ‘: increase the region around the second center value by the current interval- value.
‚ d ‘: decrease the region around the second center value by the current interval- value.
‚ r ‘: increase the region around the third center value by the current interval- value.
‚ f ‘: decrease the region around the third center value by the current interval- value.
‚ 0 ‘: set the interval back to 20.
‚ 1 ‘ – ‚ 9 ‘: set the interval.
‚ . ‘ : move up one slice
‚ , ‘ : move down one slice
‚ t ‘ : go back to the main screen.
‚ c ‚: state whether data values belonging to one of the regions should be displayed in their special colour.
‚ m ‘ : increase the minimum value for the transfer function by the current interval- value.
‚ n ‘ : decrease the minimum value by the current interval- value.
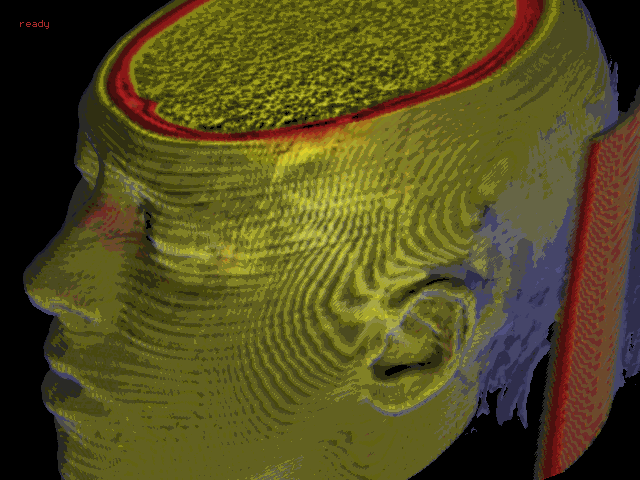
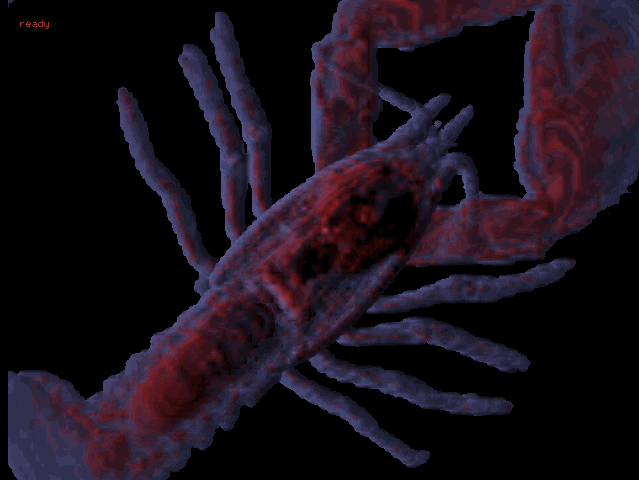
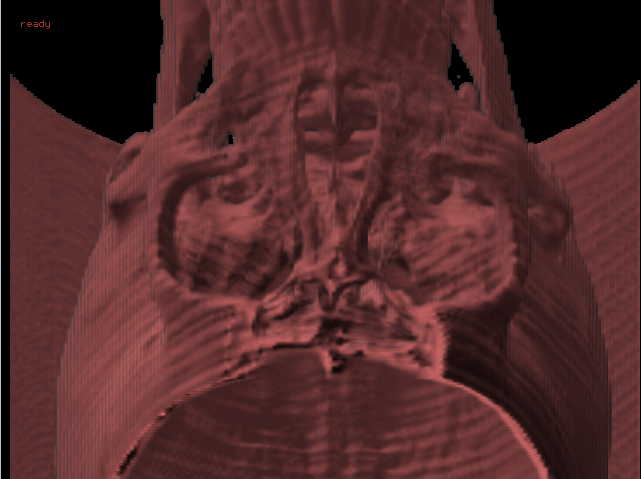
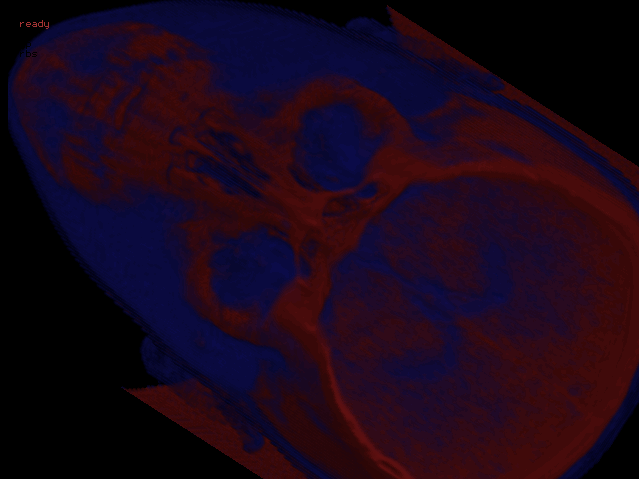
3) Examples
Here are now some example pictures generated by my program:
Here is a link to the Raycast.exe file.
