Introduction
Graph visualization is often used for Visual Analytics in many different applications from engineering to biology. Because of that reason, graph visualization has been studied extensively and many algorithms and visualization techniques have been developed.
But most of the developed interactive graph visualizations don’t produce
good layouts for large graphs with many nodes. The visualizations are often
difficult to understand and interact with. Even if the layout of a graph
is good, understanding can still be hard for example when links cross each
other or nodes are partly occluded.
To solve this problem TreePlus, a Visual Analytics component, was designed for visualizing graphs as trees. Trees have the advantage that they are intuitively to understand and the interaction with such a tree is less difficult for novice users.
This implemenation of TreePlus is based on the paper "TreePlus: Interactive Exploration of Networks with Enhanced Tree Layouts." The tool was developed with Java and the Visualization toolkit prefuse.
User Interface
The application window contains a Menubar, a panel for the legend, a panel for some controls on the bottom of the window, the preview panel on the right side to visualize adjacent nodes and the visualization panel on the left side for the tree or the graph. In the graph view on the right side is another control panel to adjust the graph visualization instead of the preview panel. The legend is only available in the TreePlus view.
The Data Menu contains the entry "Load" which is used to load a new data set.
With the Visualization Menu the user can switch between the two possible views. The one view shows the TreePlus Visualiziation and the other view the corresponding graph visualization of the dataset.
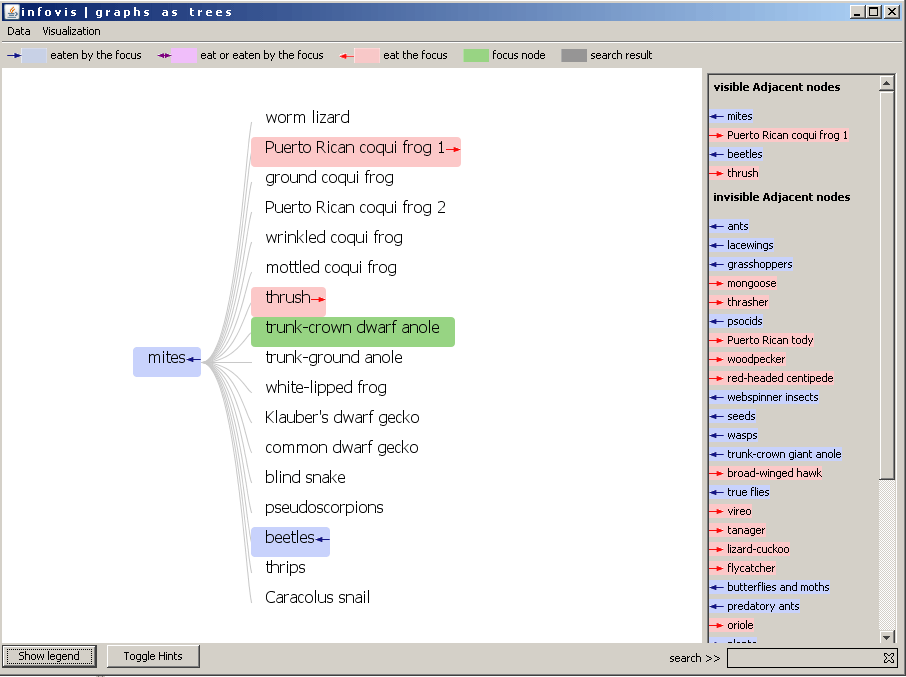
Figure 1: The TreePlus view
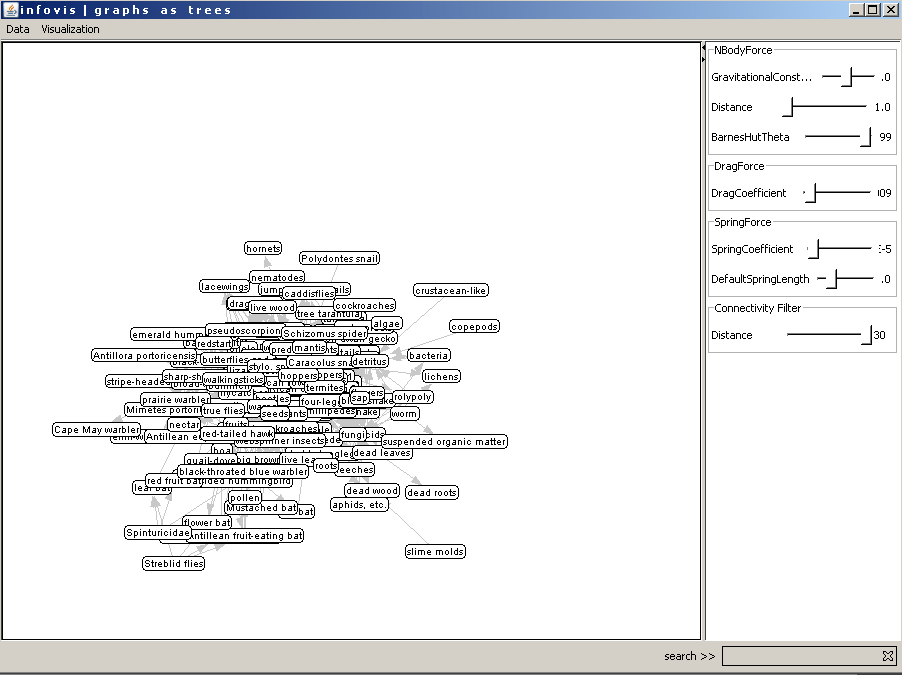
Figure 2: The graph view
Features
Highlighting and Preview of Adjacent Nodes
When the user clicks on a node the preview panel on the right side is updated and all adjacent nodes of the clicked item are shown. In the preview panel the nodes are differentiated by their visibility. Currently visible nodes in the tree are shown in the top of the panel, currently invisible nodes beneath the visible nodes. The backgroundcolor of the adjacent nodes depends on their relation to the clicked node. If the clicked node has an outgoing link to the adjacent node the backgroundcolor is blue, if the adjacent node is an incoming node the backgroundcolor is red and if there exists a bidirectional relation between the two nodes the backgroundcolor is purple. The arrows also indicate the direction of the links relative to the focus node.
The adjacent nodes are highlighted in the tree in the same way. The arrows are posititioned relativeley to the clicked node. In the following example the "red-headed centipede" was clicked. The adjacent nodes which are visible in the tree are colored and arrows are justified. This means that the "red-headed centipede" eats the "common dwarf gecko" or the ground coqui frog. But the "ground coqui frog" also eats our selected animal.
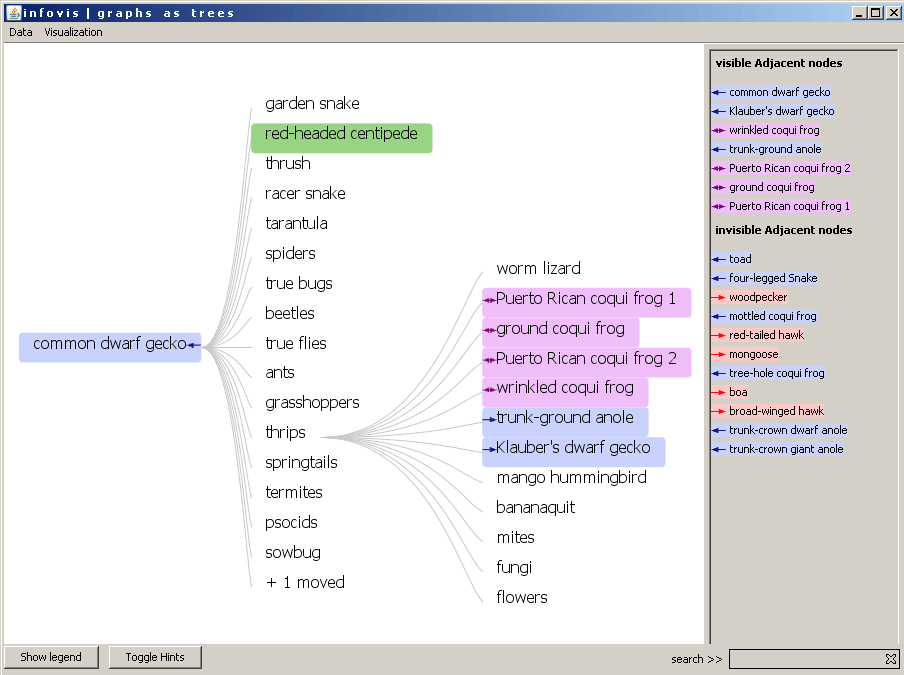
Figure 3: The red-headed centipede is the focus node and the adjacent nodes are highlighted.
Animated Update
When the user double clicks on a node the tree structure changes to include all adjacent nodes. Adjacent nodes which are already used in the tree move from their posititon to their new position near the clicked node. To help the user to overview the changes which took place a trace is leaved. This information node is introduced with the label e.g. "+2 moved" indicating that 2 nodes have moved to another node. When the user moves the mouse uppon this helping node the moved nodes are highlighted in the tree by setting their background color to orange.
During exploration of the tree the tree layout stays as stable as possible. So the opended subtrees stay open. The only exception is if the user double clicks the root node. Then the tree closes all its subtrees and only the child nodes of the root are visible.
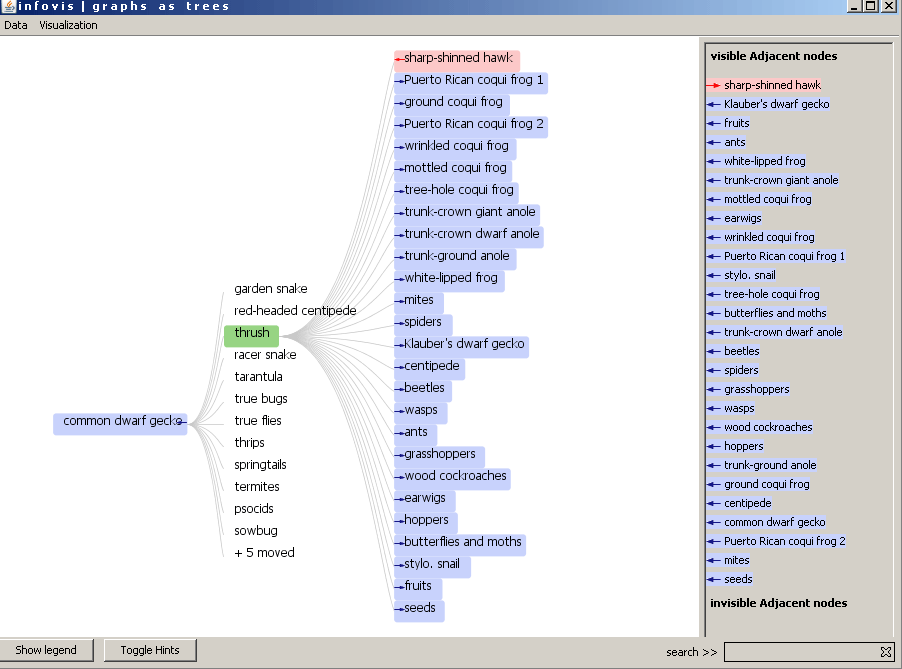
Figure 4: The visualization after double click on thrush. 5 children of the root moved to the new expanded node.
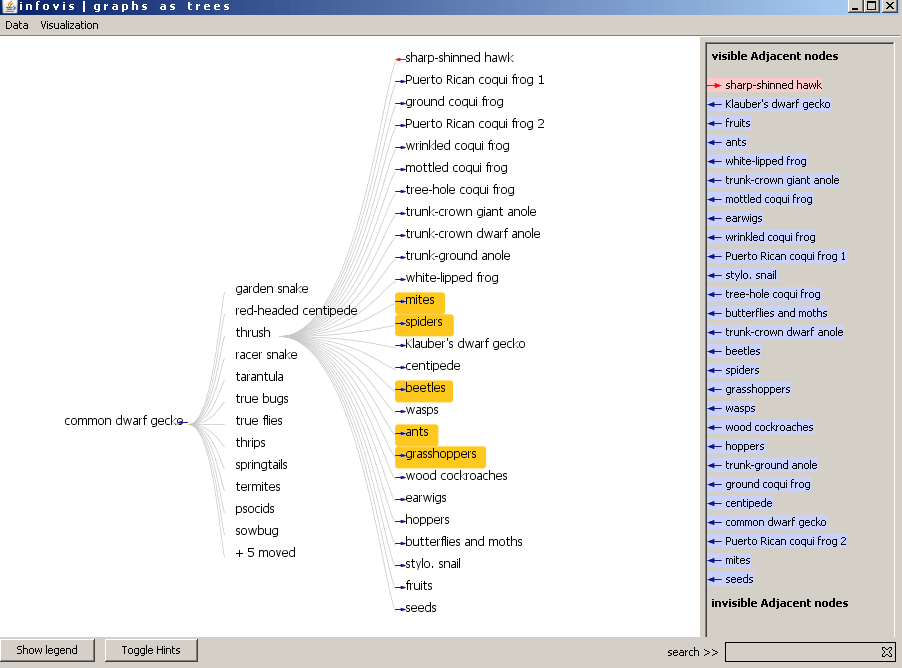
Figure 5: The moved nodes are highlighted with orange color by moving the mouse uppon the node "+5 moved"
Setting a root
After loading a datafile a default root is set for the visualization. For this default root the node with the most edges is selectedt. There are two ways for the user to select a new root. The first way is to select a node in the graph (see Graph view). The second way is to use the context menu of a node to set this node as root. In the following image the user clicks the right mouse button to open the context menu and to set the "tanager" as new root.
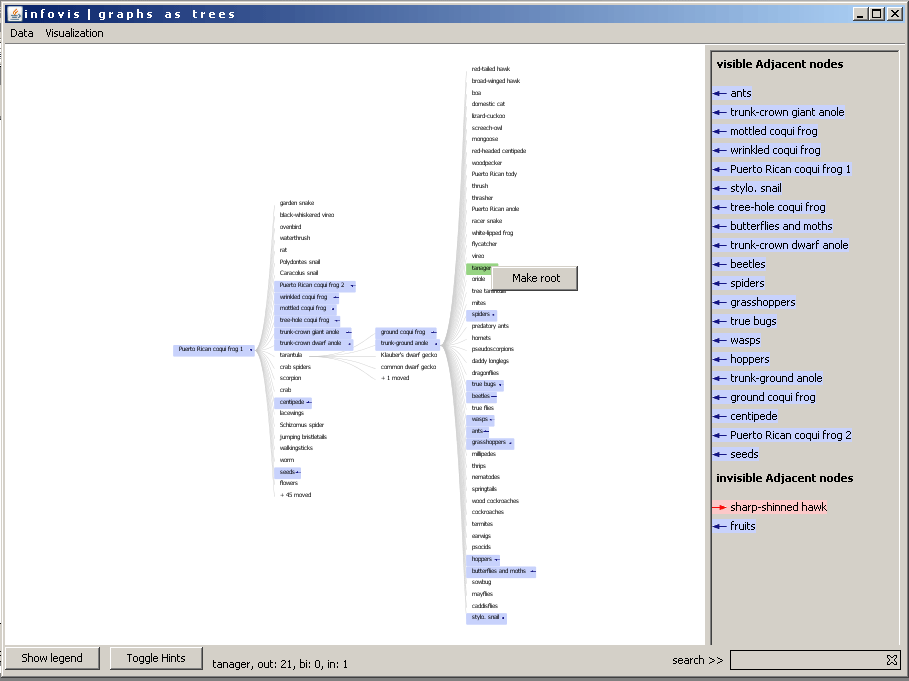
Figure 6: Setting a new root by using the context menu of the node.
Legend
With the button "Show legend" the user is able to set the legend visible. The legend is positioned uppon the visualization and shows connections between color and meaning in the visualization. When the user clicks the button again the legend will disappear.

Figure 7: The legend for the visualization.
Visual Hints
The visual hints should help the user during exploration of the tree. Color bars beyond the node name represent the number of outgoing, incoming and bidirectional links of the node. So the user has an overview how many organisms are reachable in each direction. The selected colors for the bars are the same as the colors which are used for the arrows. Red for outgoing, blue for incoming and purple for bidirectional links. The visual hints are switched on and off by clicking the button in the control panel.
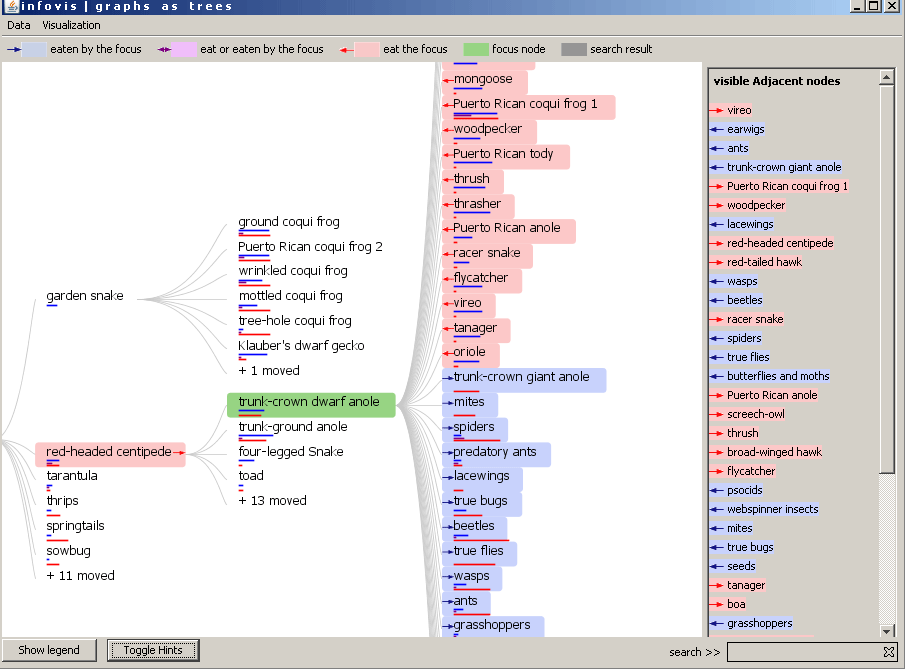
Figure 8: The TreePlus tree with visual hints.
Search
The user is able to search for a specific node name in the tree or the graph (see Graph view). By typing in the name in the textfield on the bottom of the application window the matches are colored in the tree in real time. The number of matches are also shown near the search panel. In the following example the user has typed in "tru". The backgroundcolor of the found nodes are set to grey and the number of matches is written near the search textfield (5 matches).
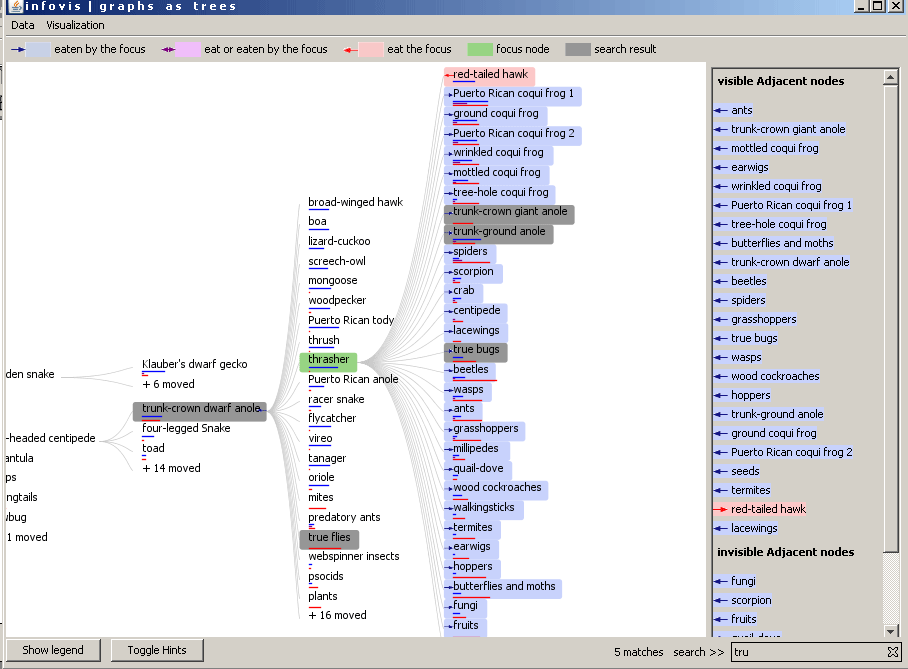
Figure 9: Searching for a node by typing in the characters of the node name.
Graph view
With the graph view the user can get an overview of the whole data. The visualization of the graph can be adjusted with the control sliders on the right side. The graph can be used to set a new root for the tree or to search for a node and then setting this node as root. The search process is the same as in the tree view. The user types in one or more characters and the matching nodes are colored. In the following example the user typed in "s" and the nodes were highlighted with orange color immediately. The number of matches are also shown next to the search field.
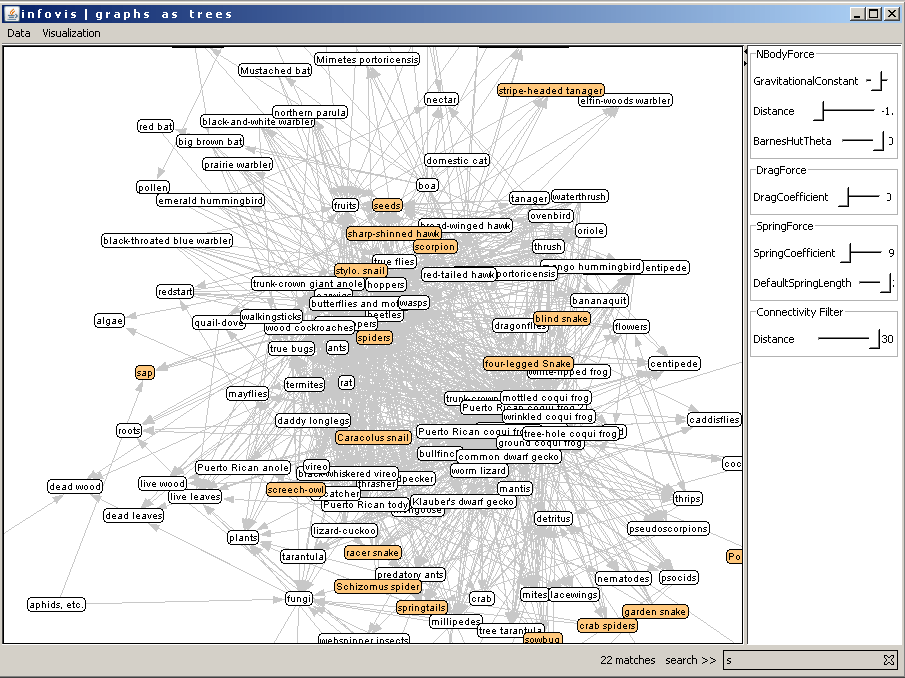
Figure 10: Searching for a node in the graph view.
By clicking a node the program switches to the tree view and sets the selected node as root. In the following two images the user selects the Puerto Rican coqui frog 1 (highlighted with red). The view changes and the selected node is the new root for the tree (Figure 12).
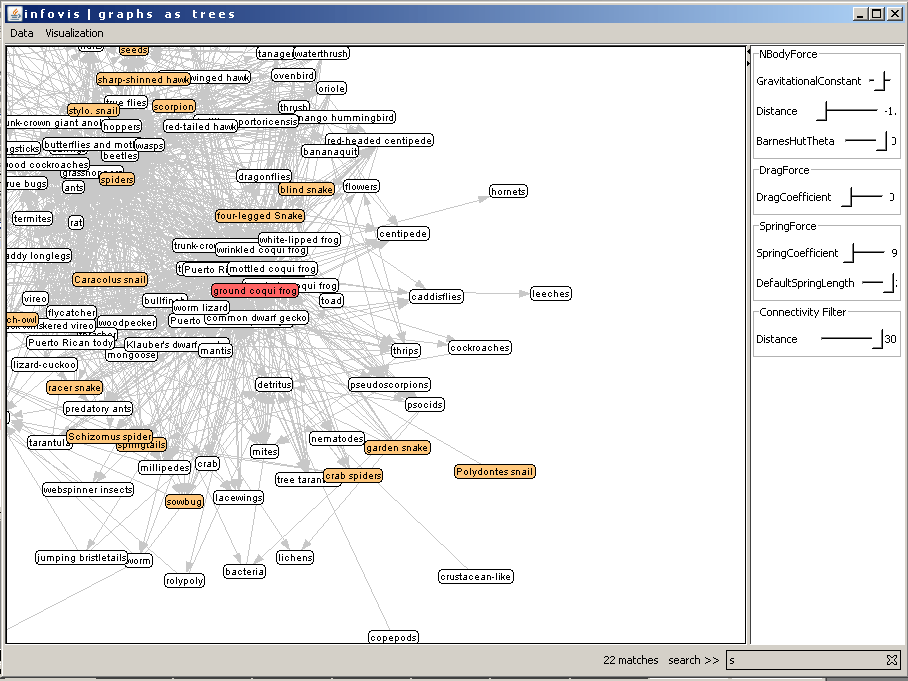
Figure 11: The user clicks on the "Puerto Rican coqui frog 1" to set a new root for the tree.

Figure 12: The tree with the new root.
Downloads
To run our TreePlus implementation one has to download the following items.
The compiled sources as Java JAR file to execute: treeplus.jar
The needed JAR file of the tookit prefuse prefuse.jar
The source code as JAR file: treeplus.src.jar
The used sample data file: sample_foodweb.graphml
The whole source including ANT build file: source.zip
Running TreePlus
The execute TreePlus, there are several ways. The most convinient one is the way starting it via ANT.
One can run the TreePlus by simply starting it via ANT and the default settings out of the source folder (source.zip). Simply use the following command.
Another way is to start TreePlus simply via the JAVA command. Therefore simply use the compiled JAR file. The commands look like the following. (Note that the jar files do not have to be in a folder)
Having the two needed jar files in the folder "dist" and the "sample_foodweb.graphml" in the folder "data", use the following command to start treeplus.
If you want to start TreePlus using a different data file, use the two optional parameters as input for the TreePlusMain class.
- FILENAME: the name of the file to use
- LABELNAME: the name of the attribute used in the *.graphml file to label the elements
Contact
Barbara Neubauer {e0625063 [at] student.tuwien.ac.at}, Harald Köstinger {e0625775 [at] student.tuwien.ac.at}
Information Visualization summer term 2010
Vienna University of Technology